
SQL Server Replication is a method for copying and distributing data from one SQL Server database to another. Much like Mirroring or Log Shipping, this technique is used to synchronize data between a primary and secondary instance, thus establishing a redundancy, most often used for failover. There are three different types of replication: Transactional, Merge and Snapshot. In this post I am going to walk through the steps one by one for configuring Transactional based replication.
There are three basic components in the Transactional replication configuration -- the Publisher, Subscriber and Distributor (database). In laymen's terms, the publisher is your primary, or the source of all data in your replication model. The Subscriber is the target instance, where your data is pushed, to create a 'redundancy'. Lastly, the Distributor is the database which contains all of the commands that will be used to move data changes from the Publisher to the Subscriber.
Distribution Database
The first step is to Configure the Distribution database. In SSMS, underneath your registered server, right click the Replication folder, and choose 'Configure Distribution...'. You will see this popup:

Click 'Next', and proceed through the following steps to configure the Distribution database.
#1. Choose the server where the Distributor database will reside. You will see the dialog gives you two options. The first is what you will choose if the Distributor database resides on the same server that replication is configured. The second choice is what you will choose if the Distributor database will be on a different server, separate from the Replication server. In this post we are choosing option #1.

#2. Now we will tell SQL Server Agent whether to start automatically. Choose 'Yes', and click 'Next'.

#3. In next dialog you will be asked where your Snapshot folder should reside. The 'Snapshot Folder' holds all of the snapshot files which contain the changed data and schema from the Publisher. This folder could really go wherever you want, but you probably want to avoid putting it on the C drive.
Create a folder on the drive of your choosing, and hit 'Next'.

#4. The next dialog allows you to provide the name and location for the distribution database data and log files. The only thing I would really recommend here is that they are on separate drives, just like your other database data and log files should be. Input your database name, data and log file path and names, and hit 'Next'.

#5. The next dialog is just to confirm, or enable the distribution database that you have just defined. Choose 'Next'.

#6. The next dialog asks you to choose what happens when you hit Finish. You have two options; Configure distribution or Generate a script with steps to configure the distribution. Choose 'Configure distribution' and then 'Finish'.
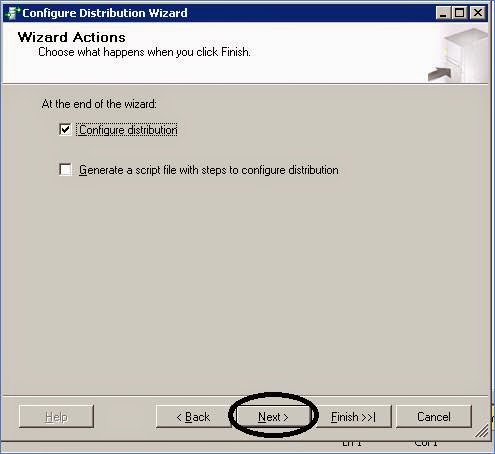
#7. After choosing to finish, this is the final dialog that you will receive:

Now your distribution database is complete, as you'll see if you expand your system database folder in the Databases hierarchy, like this:

Create the Publisher
That's it for the distribution database, and we will proceed now to create the Publisher.
#1. Still in SSMS, right click on the 'local publications' folder within the replication hierarchy and select 'New Publications'.

#2. You will now see a 'New Publication Wizard' dialog box. Click 'Next' to proceed.

#3. The next dialog tells you to 'Choose the database that contains the data or objects you want to publish'. In this posting I am just going to use my AdventureWorks2008 database. Then hit 'Next'.

#4. Here we choose the type of publication.

#5 Now we select the objects we want to publish, which are referred to as 'Articles'. I'm just going to select one table in this example, as you can see in this screenshot:

#6. In this example we have no filtering conditions, so just hit 'Next' to proceed.

#7. Now we need to configure when the Snapshot Agent will run. I choose to create immediately, as you can see here:

#8. Here we define our agent security.
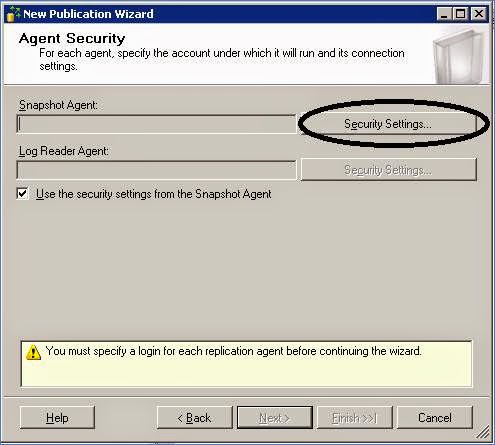


# 9. When the security is all configured we will finish the Publisher by choosing the 'Create the publication' option.


Create the Subscriber
We will now create our subscriber as follows:
#1. Right Click on the publisher you just created and choose 'New Subscriptions'.

#2. This will result in a new dialog box labeled 'New Subscription Wizard'. Choose 'Next' to continue.

#3. Choose 'Next' again to bring up the dialog for the Distribution Agent Location.

#4. Now we will choose our subscribers, and specify the subscription database. The subscription database can be created by restoring the publisher db, or by creating a new databases, which is what we are going to do here.

#5. In the next dialog box you will input the name of the Subscription database, as well as the paths for the location of the data and log files.

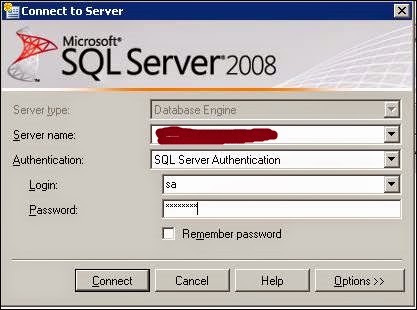
#6. Because our subscriber is on a different server, we will also need to perform the following effort, to select the SQL Server Subscriber. Click on the down arrow available on the Add Subscriber button.

#7. Choose 'Add SQL Server Subscriber', then add the server name, the authentication and the login and password.
#8. You can just 'Next' through the next dialog box.

#9. In this next dialog we need to specify the process account and connection options for the Distribution Agent.

#10. In the next dialog we will define the Distribution Agent Security. You should choose to run the agent under the SQL Server Agent service account, and choose the option to impersonate the process account for both the Distributor and Subscriber connections. You can see those options explicitly in the second picture below.


#11. You will click 'OK', and receive the next dialog box.

#12. In the Synchronization Schedule dialog that follows, you will want to enable the Agent Schedule to 'Run continuously'.

#13. Click 'Next' to receive the final dialog on the Subscription creation.

#14. Choose the 'Create the subscription(s)' option, and then 'Finish'. You should receive this as your final output.

That's pretty much it. If you go back to the 'Replication' hierarchy within SSMS, and expand 'Local Publications', you should now see your new Subscriber as I've shown here.

Obviously, I have only shown you the very top level of Transaction Replication setup. Take a look at some of the references below for much more detail in this regard. I will also get back here soon to post a few problem solving scenarios that I have used in the past with a couple of different Replication errors.
Replication overall:
Replication Types:
Technical reference:
No comments:
Post a Comment